Quickstart
Get from "empty workspace" to "first answer" in about five minutes. You can do every step in the hosted app — no install required.
1. Add a source → 2. Scan → 3. Approve the model → 4. Ask a question → 5. Connect an AI client
Each step takes a click or two. Buttons you press look like + Add source; values you type are monospaced.
1. Register a source
In the app, go to Connectors and click + Add source, then pick a category and a system. AgentData connects read-only and profiles the schema; it never copies your data into its registry.
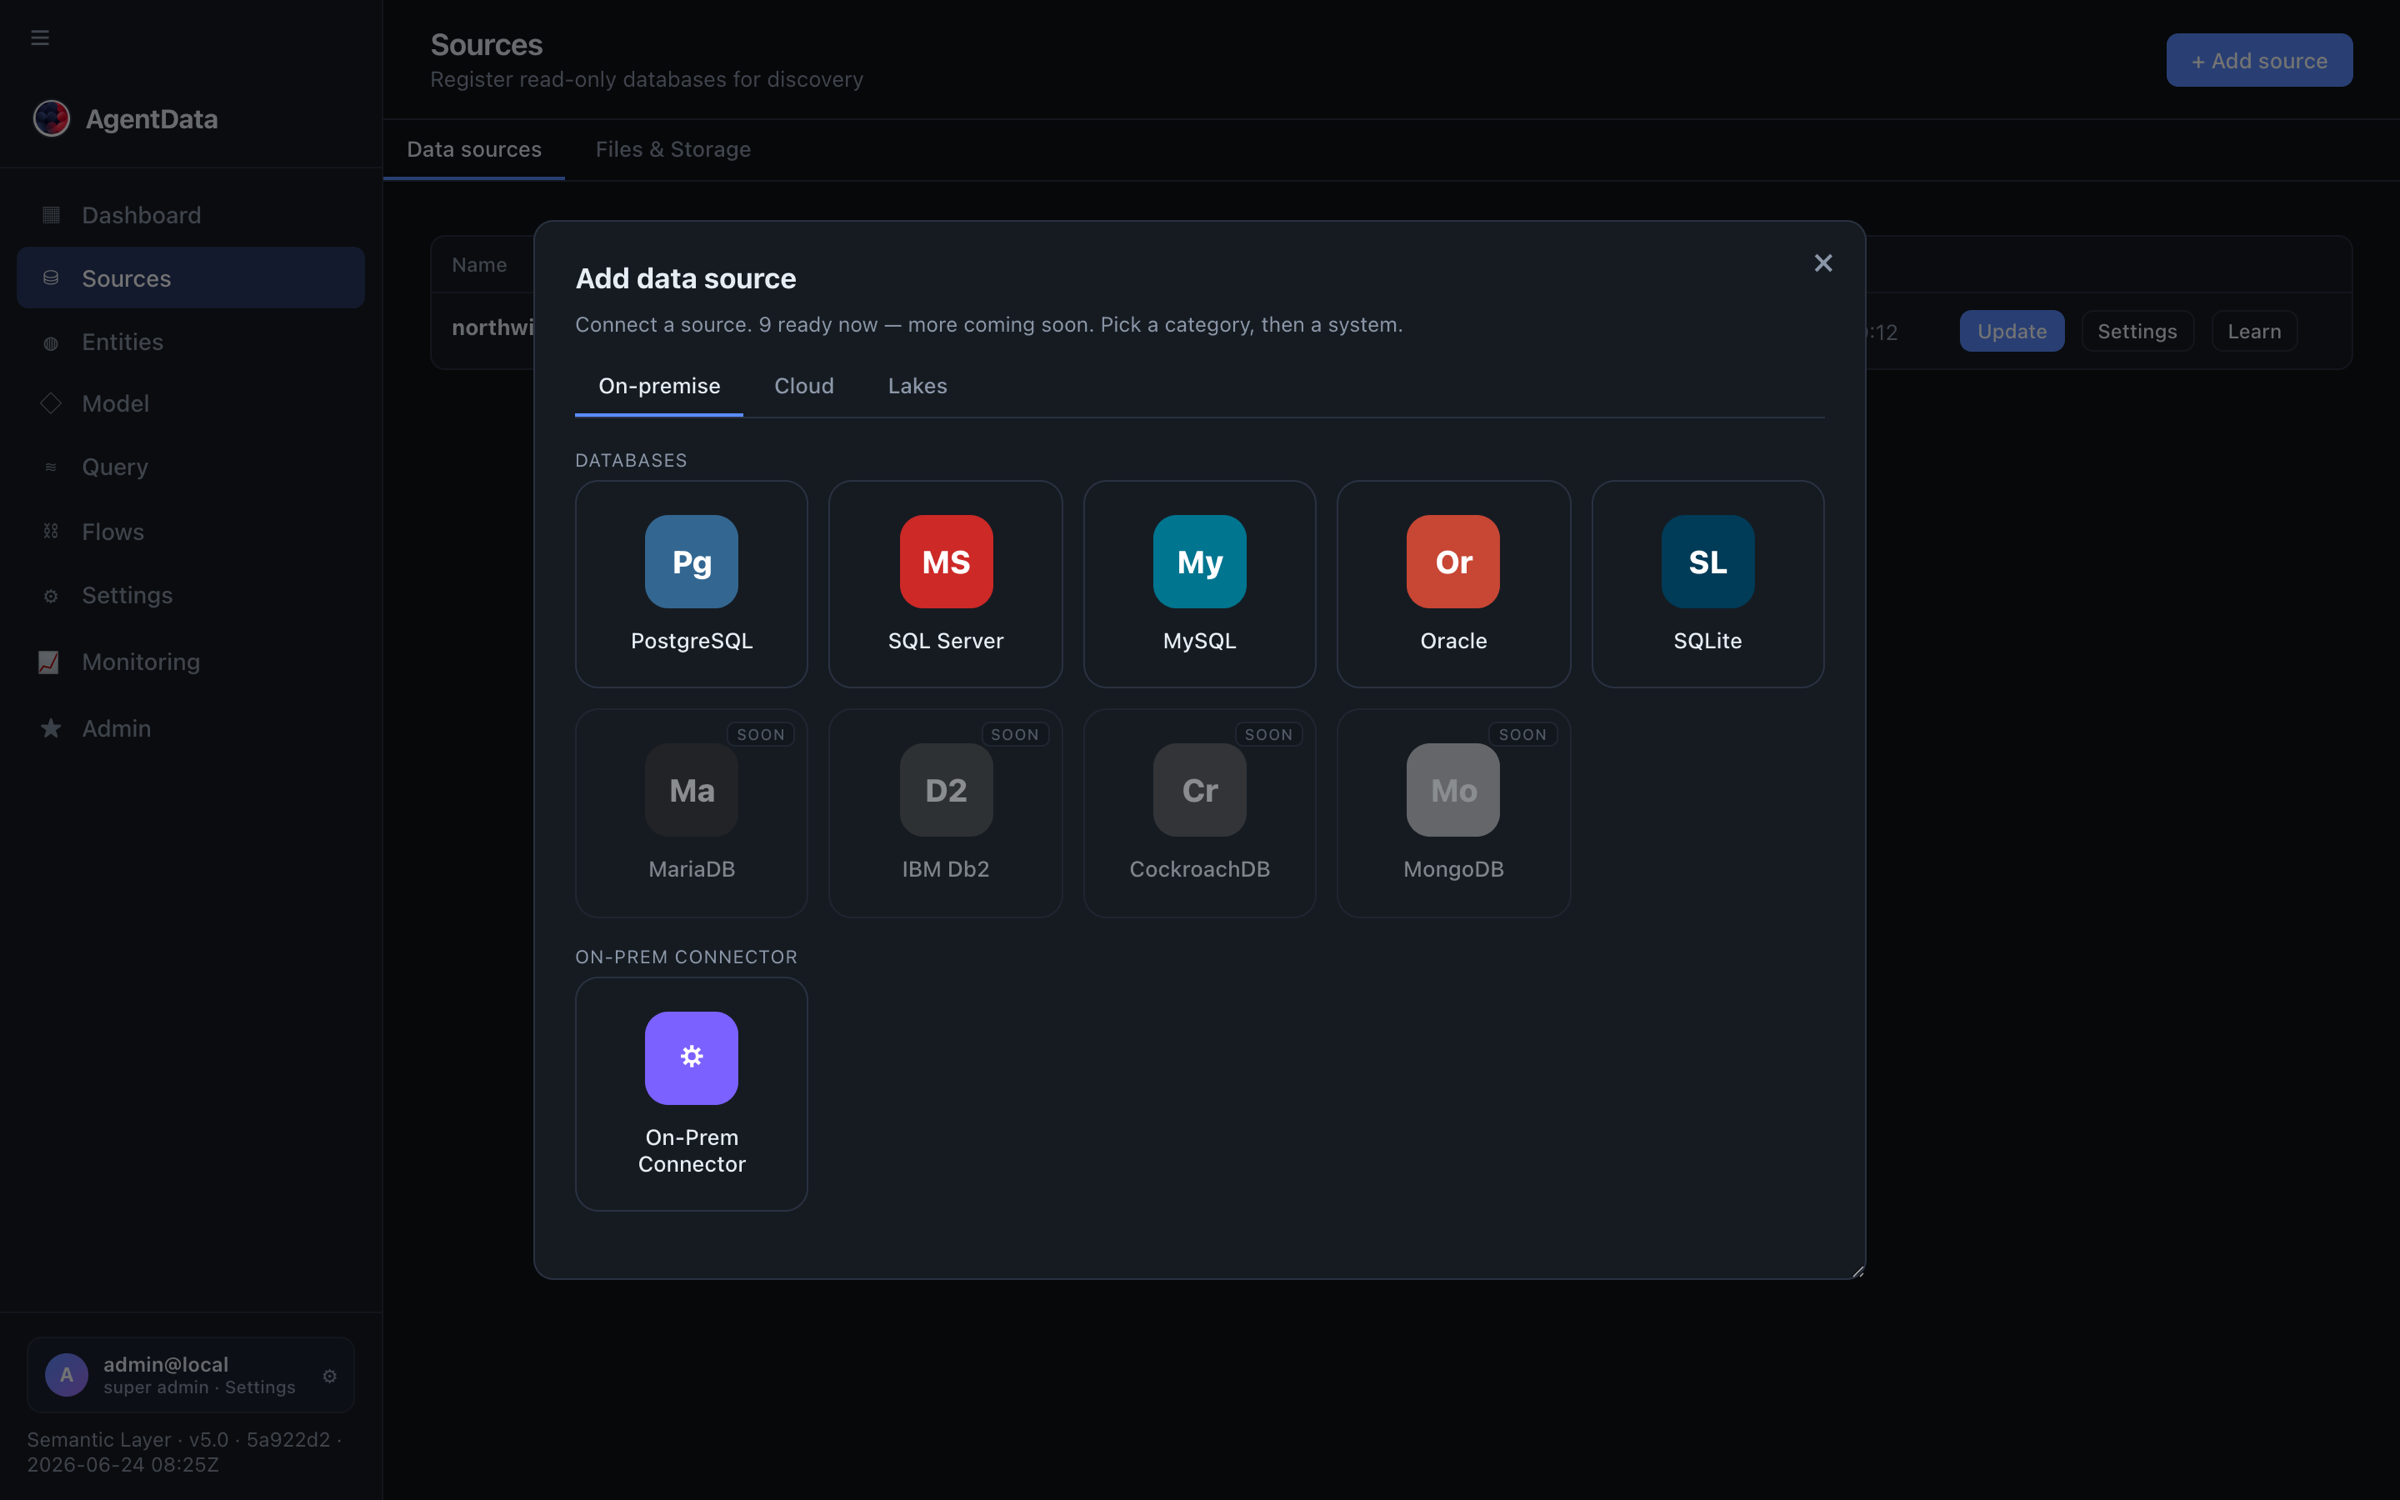
{
  "name": "northwind",
  "type": "postgres",
  "conn_str": "postgresql://readonly_user:••••@db.internal:5432/northwind"
}
Don't have a database handy? Use the bundled Northwind demo to follow along.
The gallery has more than databases — warehouses (Snowflake, Redshift), lakes (S3), SaaS APIs (HubSpot, Apollo, Hunter), and an outbound-only on-prem connector for systems you can't expose. Each asks only for what it needs (a connection string, or just an API key). See Connect a database.
2. Scan it
Trigger a scan (Discovery → Scan). AgentData profiles each table, classifies columns, and proposes entities (Customer, Order, Product…) with their measures and dimensions.
3. Review and approve the model
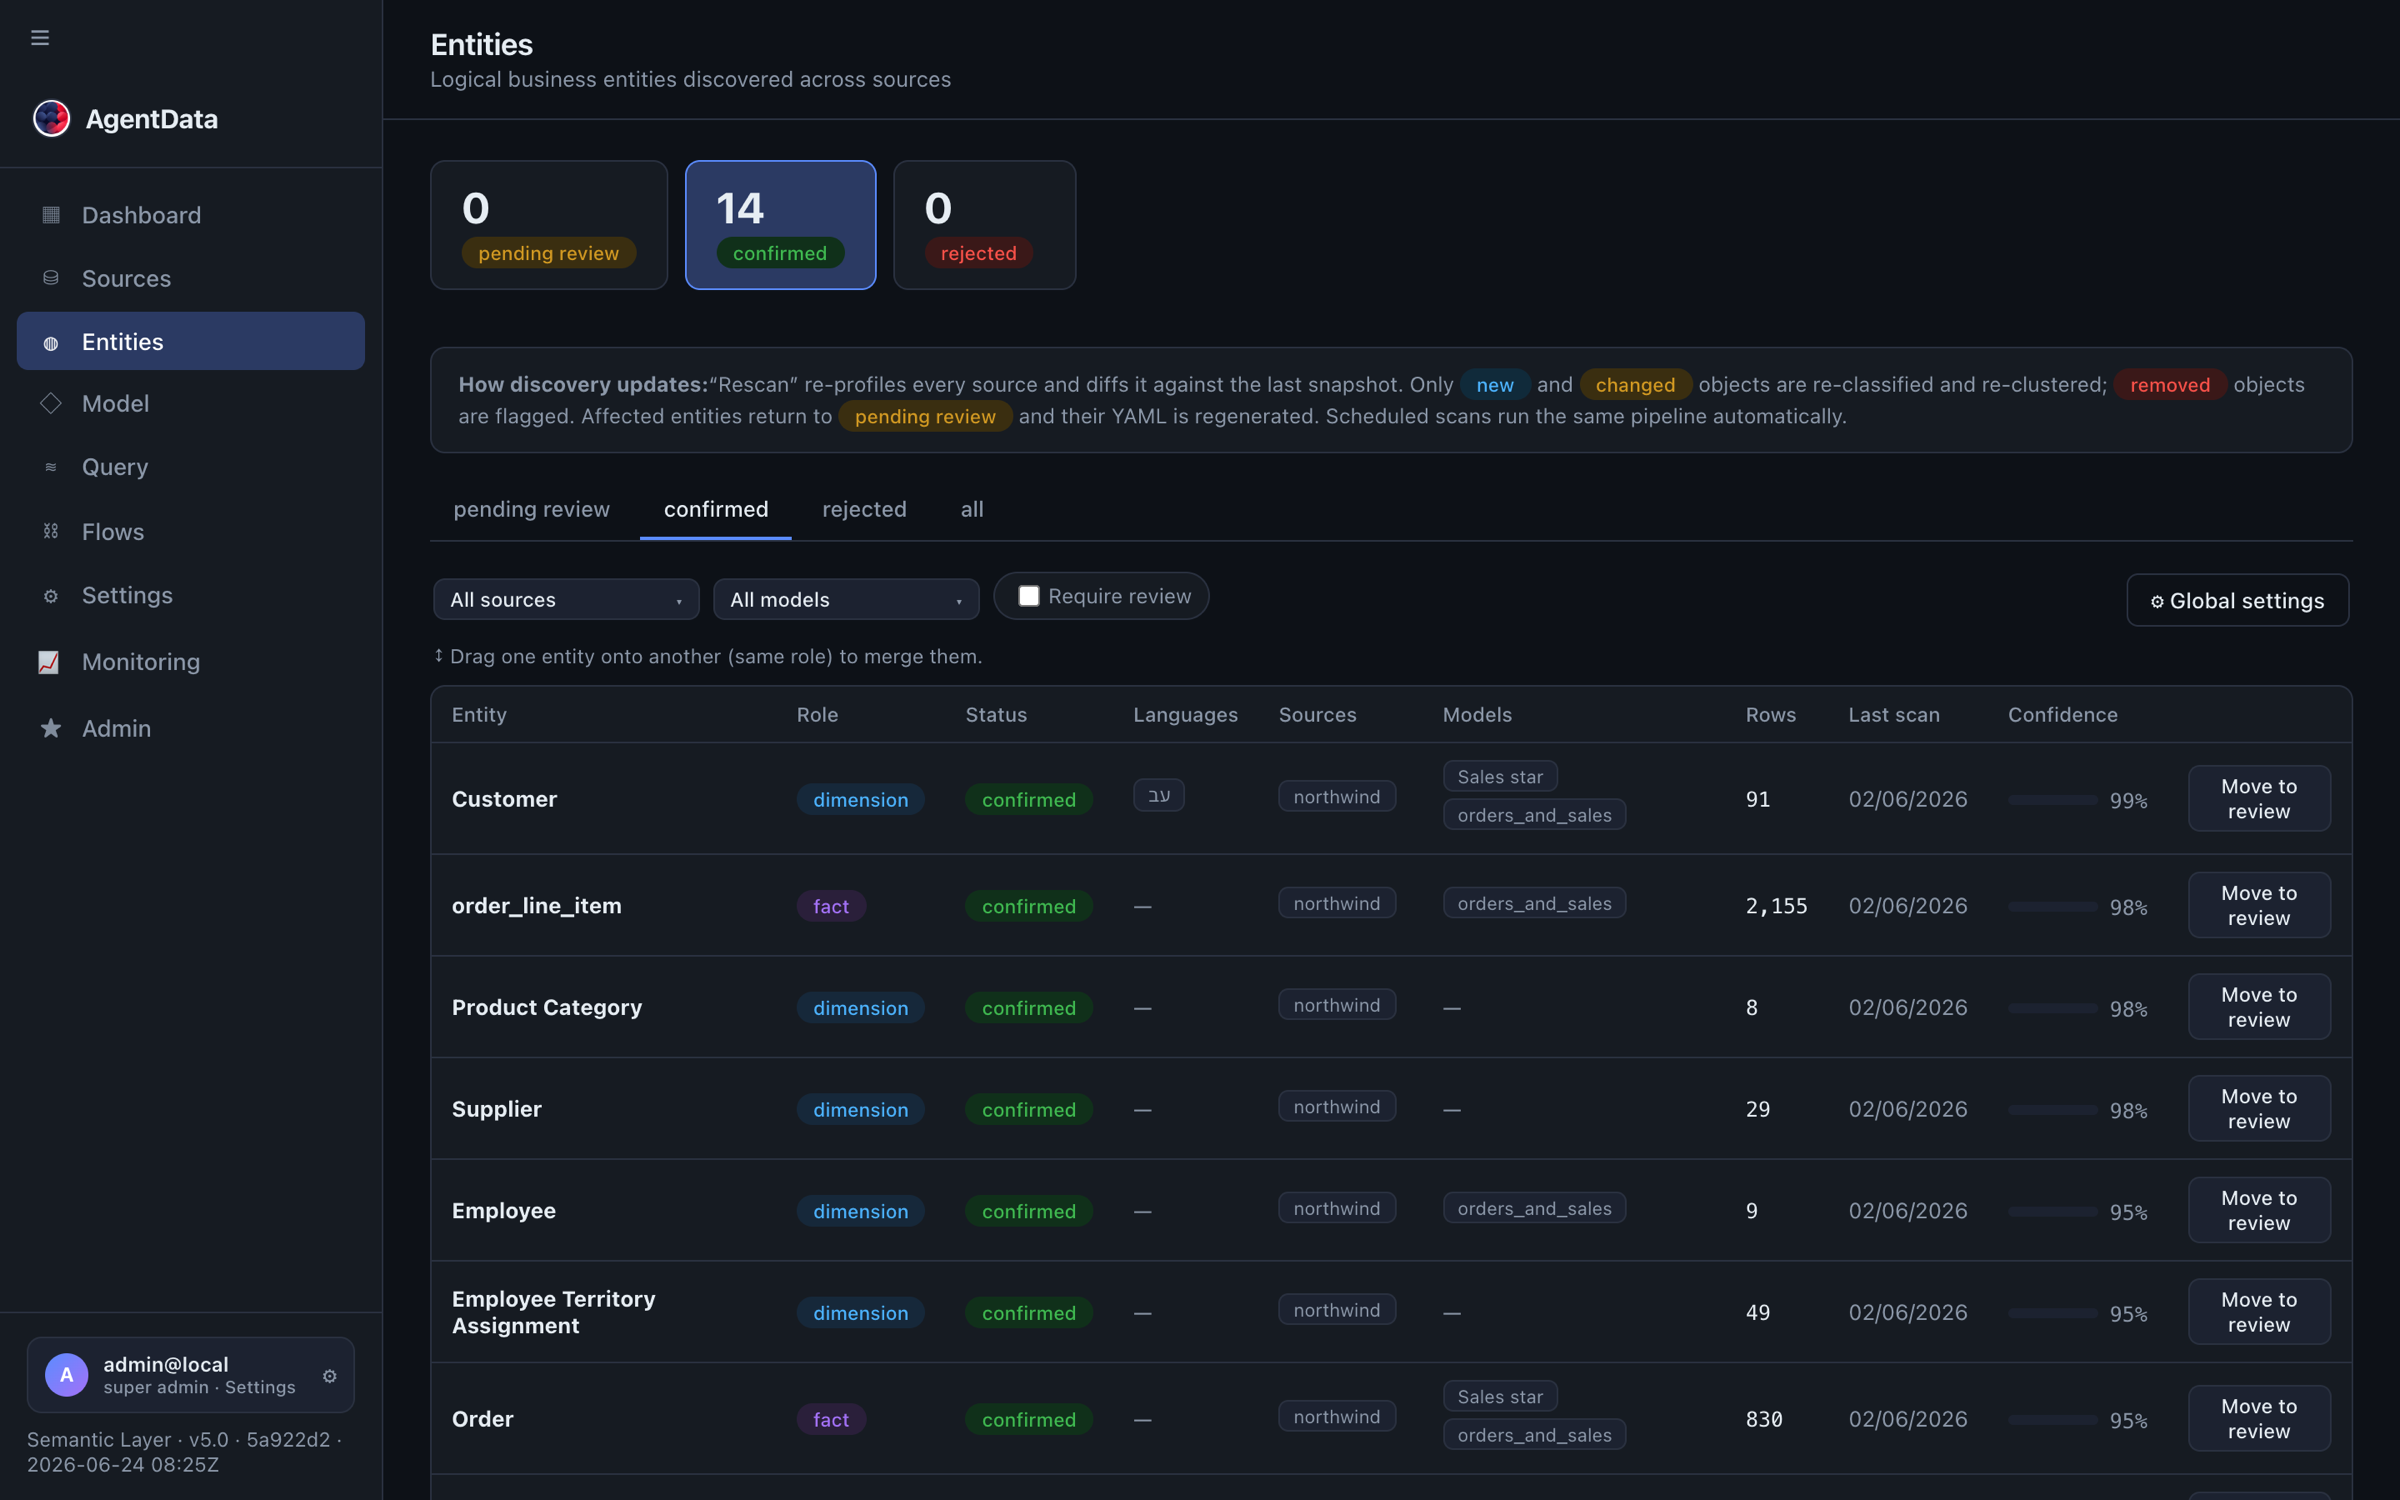
Open Catalog → Entities. Each discovered entity starts as pending_review. Check the names and roles, then Approve all. Approved entities become confirmed and queryable. (You can rename, merge, split or add calculated columns here too — see Concepts.)
4. Ask your first question
In Conversation → Query, on the NL tab, ask in plain language:
top 5 products by revenue
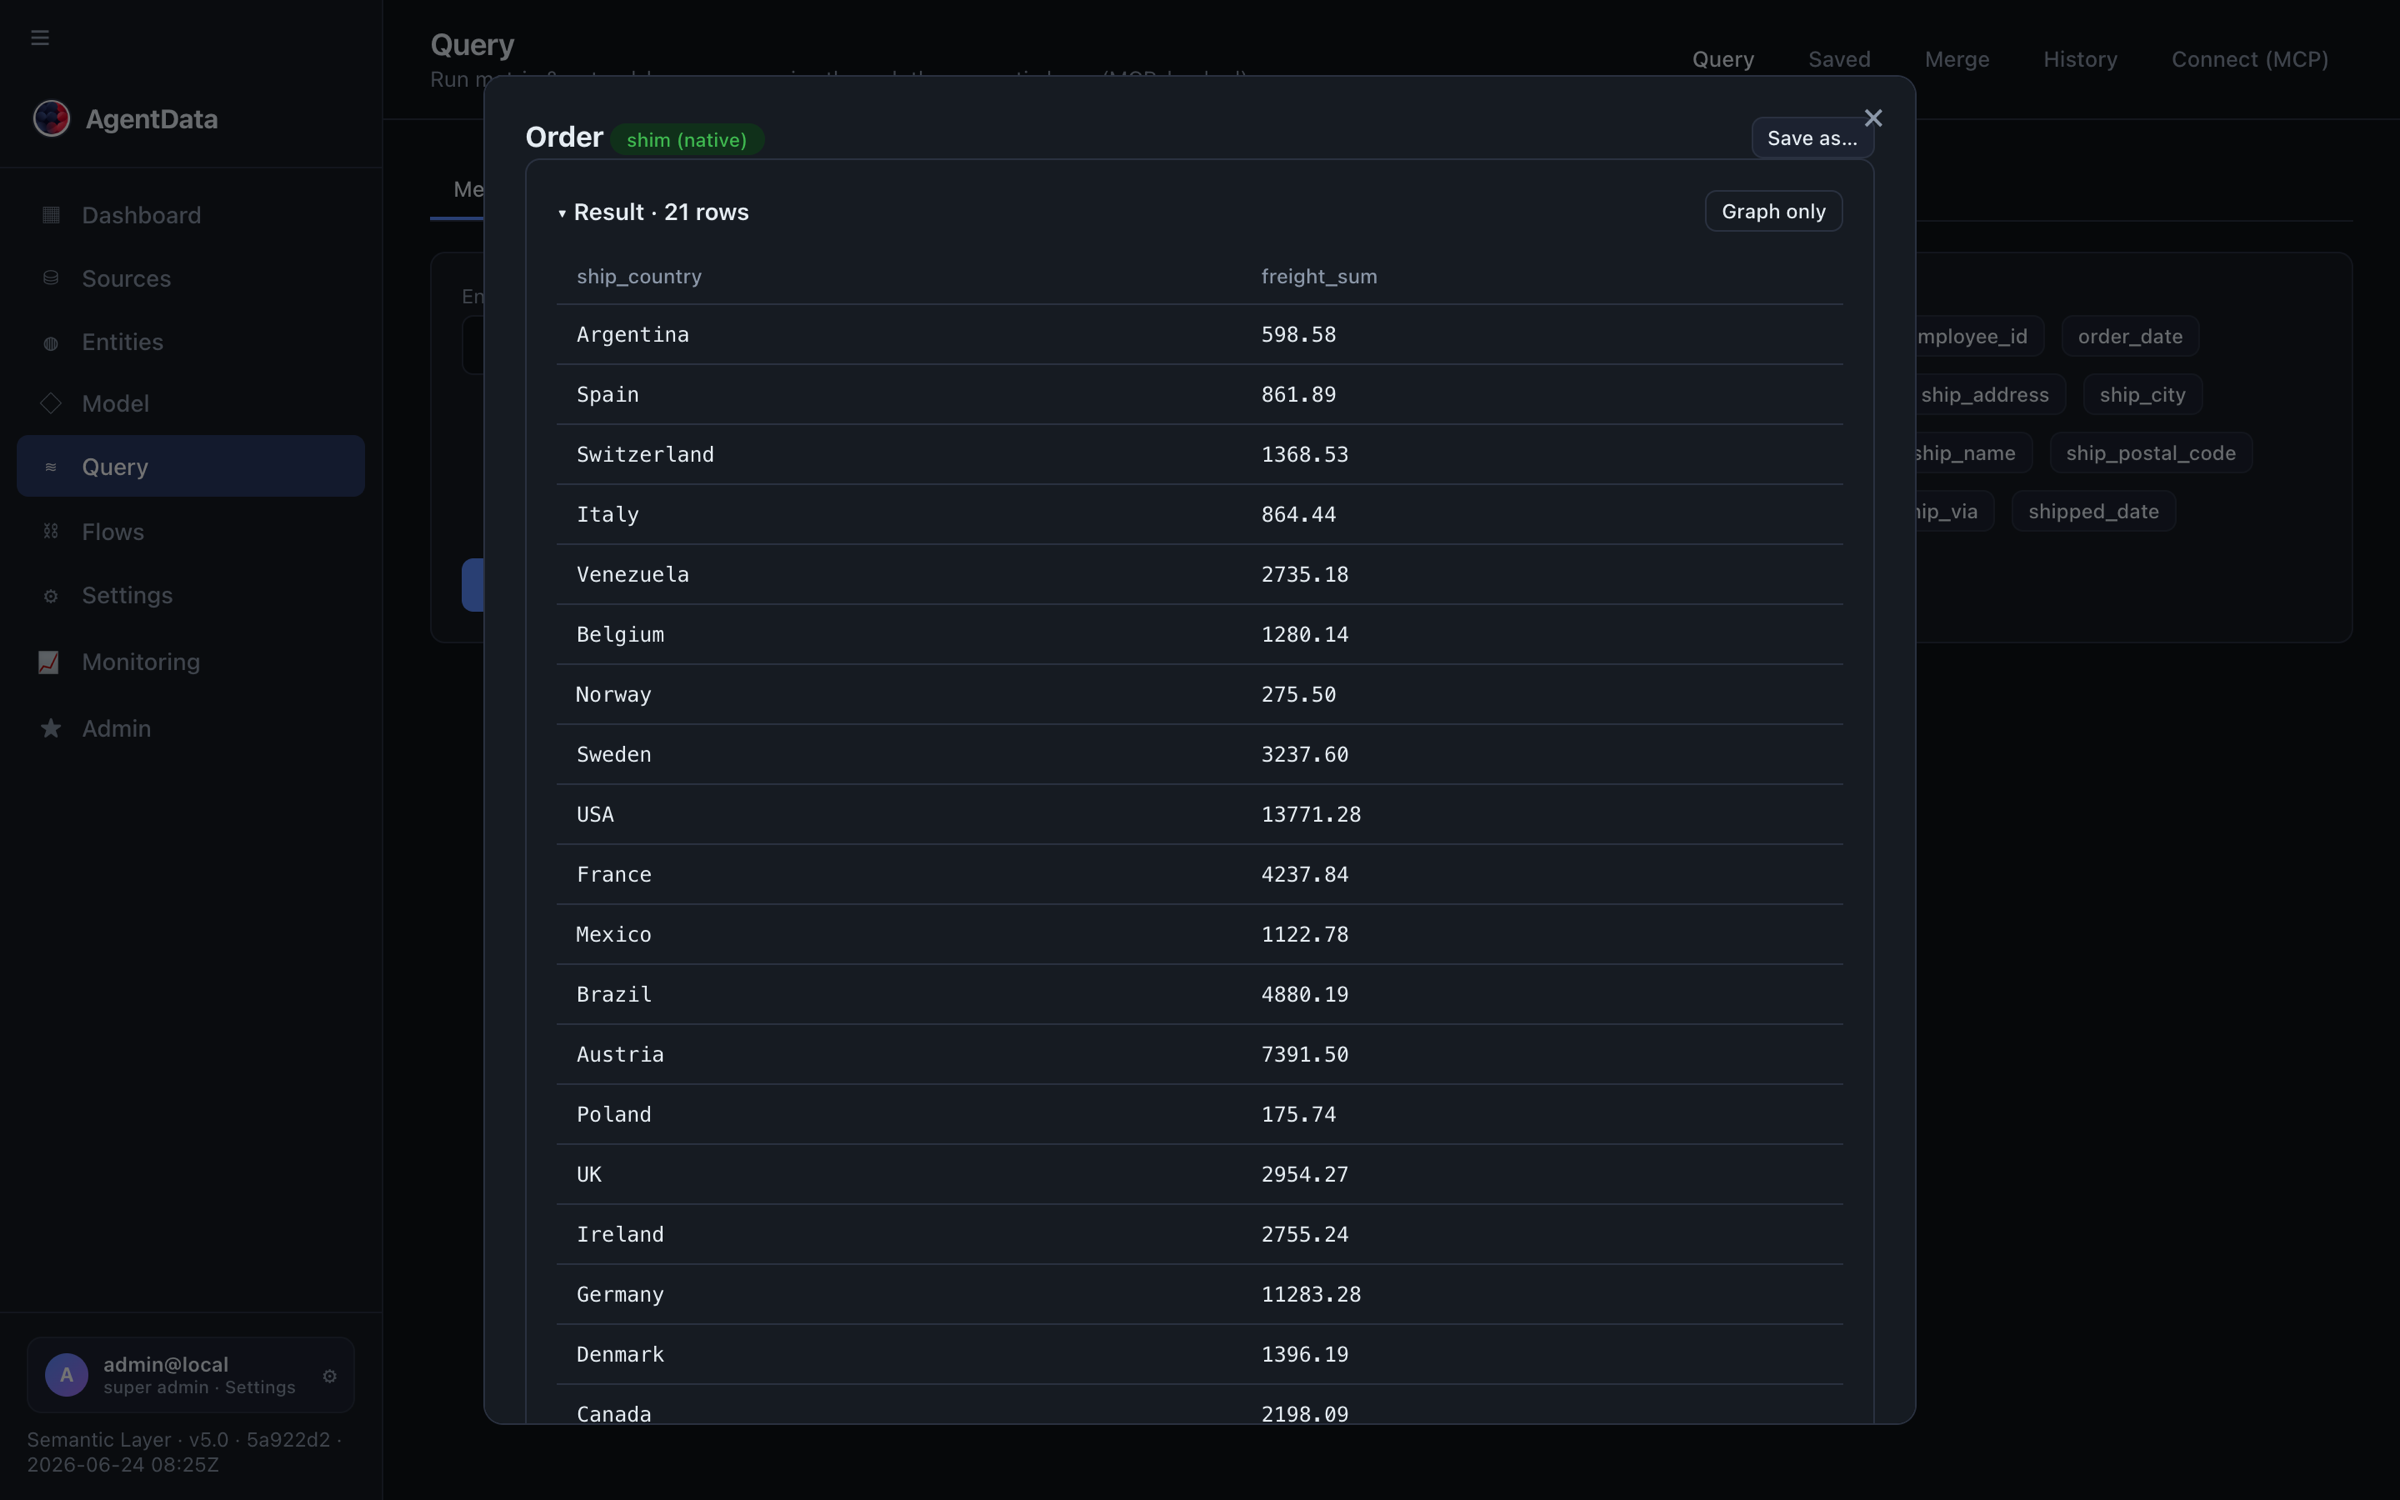
AgentData plans the query against your approved model, validates it, runs it locally, and returns the rows plus the generated SQL. Follow-up questions and other languages work too. You can also build a precise metric query by picking an entity, measures and dimensions:
5. Connect an AI client over MCP
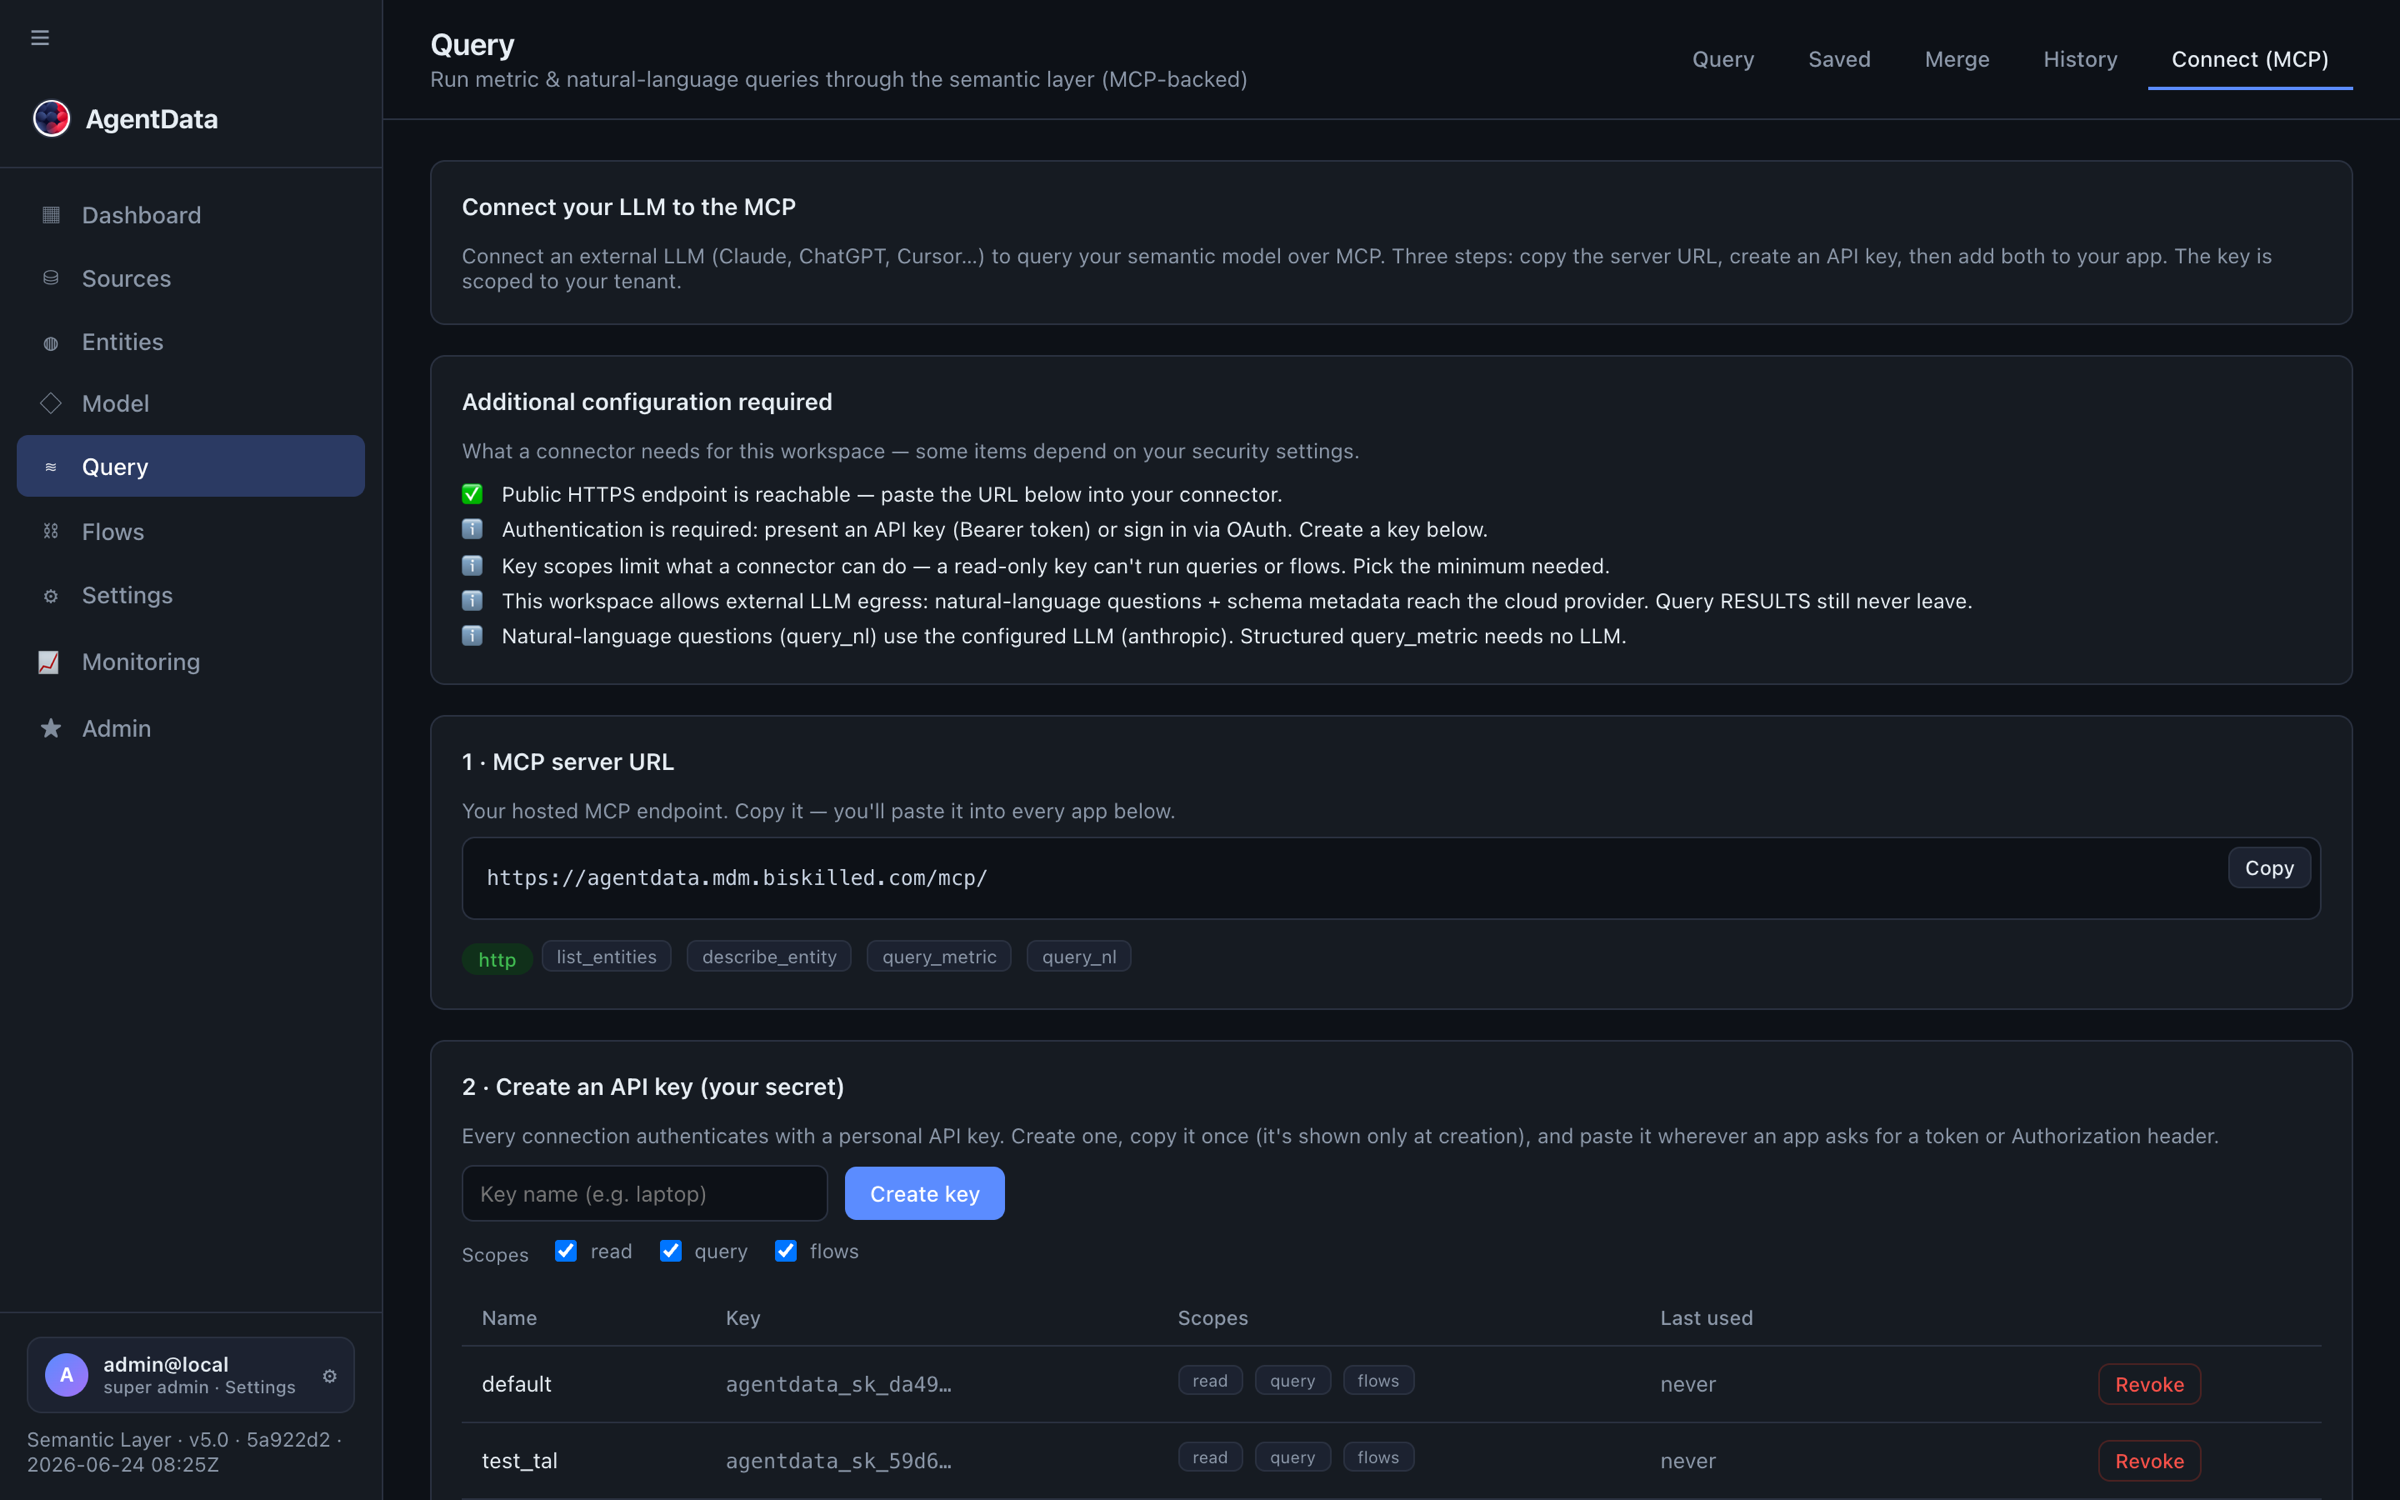
Go to Conversation → Query → Connect, click Create key (choose its scopes — read, query, or flows), and point any MCP client at:
https://agentdata.mdm.biskilled.com/mcp/
Now Claude, ChatGPT or your IDE can call query_nl and answer questions straight from your data. See MCP server for client config.
Do it from the API instead
Every step above maps to a REST endpoint. Once you have a key:
curl -X POST https://agentdata.mdm.biskilled.com/api/query/nl \
  -H "Authorization: Bearer agentdata_sk_…" \
  -H "Content-Type: application/json" \
  -d '{"question": "top 5 products by revenue"}'
See the full API Reference for request and response schemas.
Where to next
Four quick starts walk the app's sections in order — each ~10–15 minutes:
- Model your data & ask questions — Catalog + Conversation: the foundation.
- Enrich leads → HubSpot → get notified — an Agent Flow with Hunter/Apollo, HubSpot write-back and Slack alerts.
- Expose a governed Data API service — a tokenized JSON endpoint in a few clicks.
- Build & publish reports — Power BI, Excel, Google Sheets, Metabase and the rest.
For deeper scenarios, see the use cases (lead enrichment end-to-end, replacing SAP ETL, a unified semantic layer) — or go deeper on the building blocks: Core concepts, MCP server, Security.